
🗺️react native에 kakao map 연동하기(feat. 현재 위치 띄우기 + 키워드 검색)
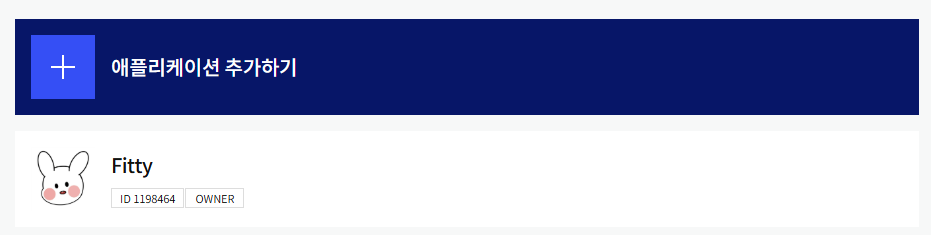
1. 아래 카카오 콘솔에 접속해 애플리케이션 추가하기
https://developers.kakao.com/console/app
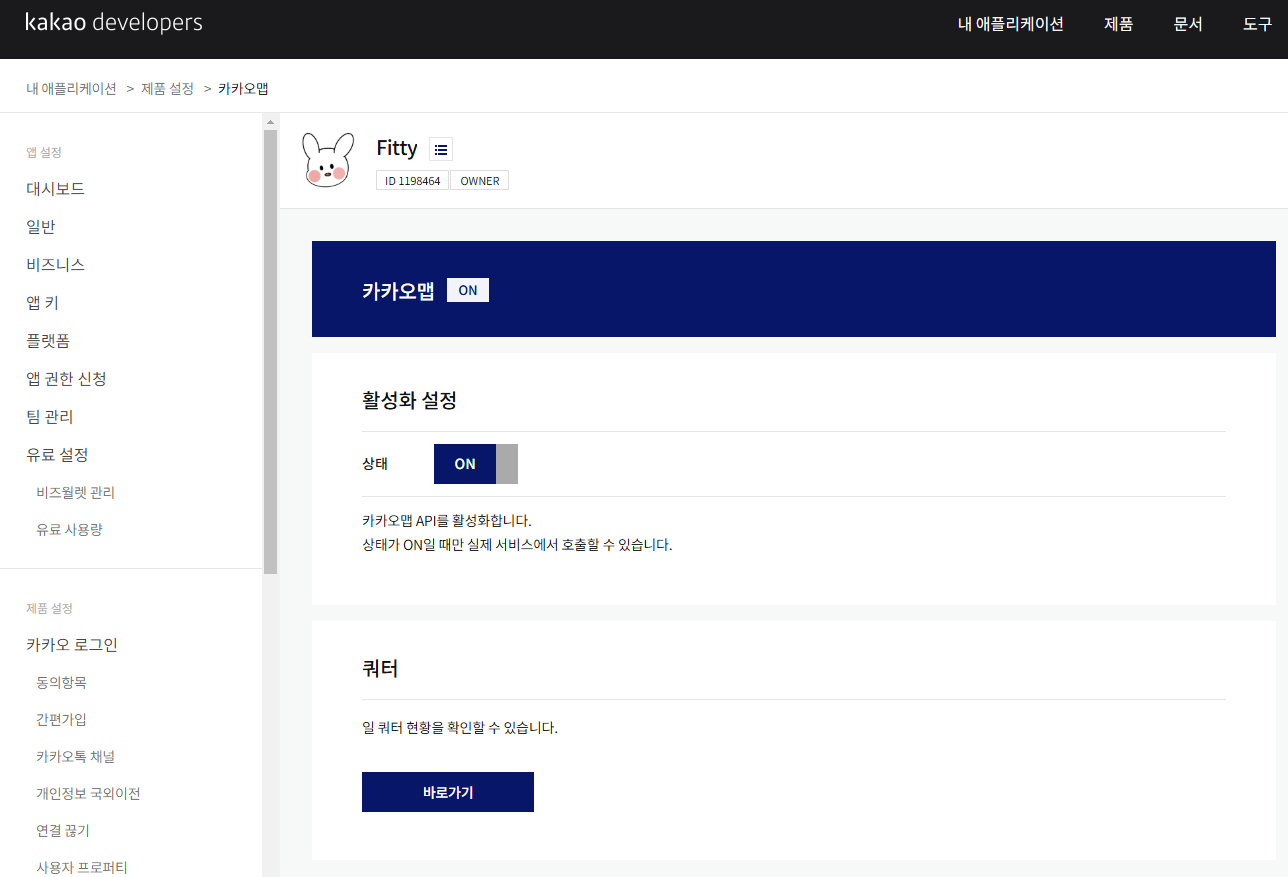
2. 카카오맵 ON 해주기
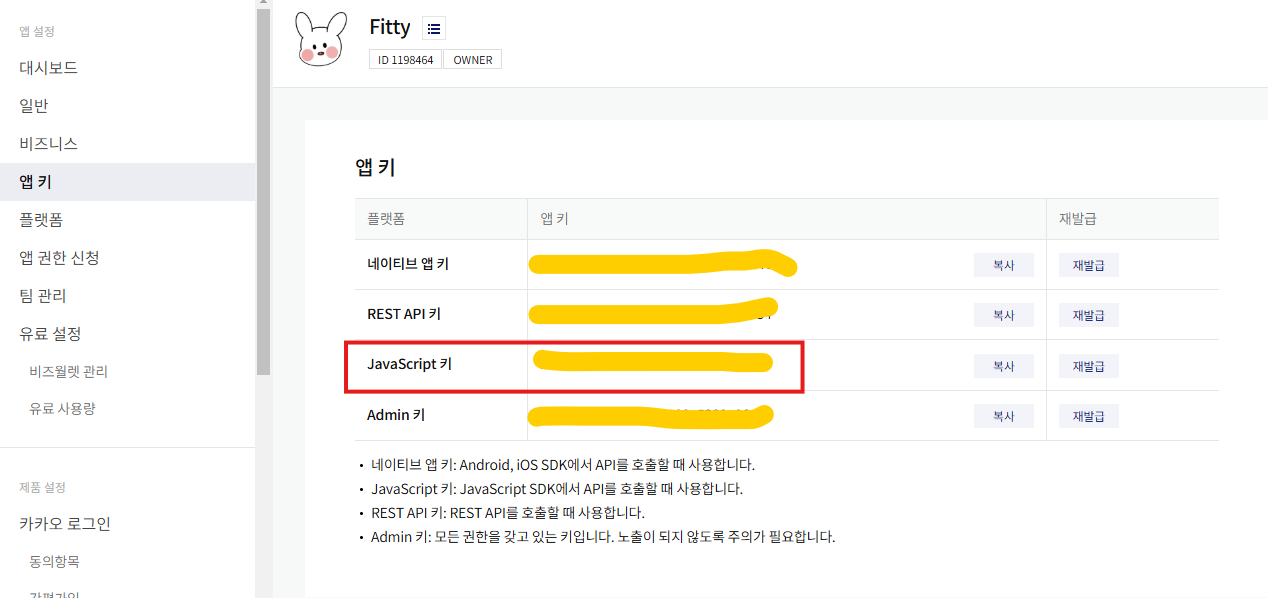
3. 앱 키에서 JS 키 저장해두기
.env파일에 넣어줄거임!
4. 필요 라이브러리 설치하기(웹뷰 & dotenv)
전에 아래 명령어로 웹뷰 라이브러리를 설치하자.
pnpm add react-native-webview
그리고
Expo가 기본적으로 .env 파일을 지원하지 않기 때문에, react-native-dotenv와 같은 패키지를 사용해야 한다...
pnpm add react-native-dotenv
위 명령어 설치후 env파일에 아까 위에서 저장한 JS키를 넣어준다.
babel.config.js 파일을 만들어 아래 코드를 입력해야한다..!
module.exports = function (api) {
  api.cache(true)
  return {
    presets: ['babel-preset-expo'],
    plugins: [
      [
        'module:react-native-dotenv',
        {
          moduleName: 'react-native-dotenv',
          path: '.env',
        },
      ],
    ],
  }
}
타입오류가 나 아래 ts파일도 따로 넣어주었다 ㅠㅠ
// @types/react-native-dotenv.d.ts

declare module 'react-native-dotenv' {
  export const KAKAO_MAP_JS_KEY: string
}
위 설정을 하면 env 변수를 가져올 때
아래와 같이 import 할 수 있돠!
import { KAKAO_MAP_JS_KEY } from 'react-native-dotenv'5. 카카오 맵 컴포넌트 만들기
React Native로 카카오 지도를 띄우기 위해 열심히 삽질(?)했다....
처음에는 아무리 코드를 수정하고 로그를 찍어봐도 지도가 뜨지 않아 한참 헤맸는디,,, (카카오 맵 테스트하시는 분들.. 로그가 잘 찍히는지 확인 꼭 하십쇼,,^^,,)
원인은 너무나 단순했다! 😭
바로 지도의 width와 height 값을 제대로 설정하지 않아서... 🚬

import React from 'react';
import { View, StyleSheet, Text } from 'react-native';
import { WebView } from 'react-native-webview';
import { KAKAO_MAP_JS_KEY } from 'react-native-dotenv';
type KakaoMapProps = {
latitude: number;
longitude: number;
};
export default function KakaoMap({ latitude, longitude }: KakaoMapProps) {
const htmlContent = `
<!DOCTYPE html>
<html>
<head>
<meta name="viewport" content="width=device-width, initial-scale=1.0">
<script src="https://dapi.kakao.com/v2/maps/sdk.js?appkey=${KAKAO_MAP_JS_KEY}&libraries=services"></script>
<style>
body { margin: 0; padding: 0; height: 100%; }
html { height: 100%; }
#map { width: 100%; height: 100%; }
</style>
</head>
<body>
<div id="map"></div>
<script>
window.onload = function() {
console.log('Kakao Map API Loaded');
if (typeof kakao !== 'undefined' && kakao.maps) {
console.log('Kakao Maps is available');
const mapContainer = document.getElementById('map');
const mapOption = {
center: new kakao.maps.LatLng(${latitude}, ${longitude}),
level: 3
};
const map = new kakao.maps.Map(mapContainer, mapOption);
// 마커 추가 (선택 사항)
const markerPosition = new kakao.maps.LatLng(${latitude}, ${longitude});
const marker = new kakao.maps.Marker({
position: markerPosition
});
marker.setMap(map);
} else {
console.error('Kakao Maps is not available');
}
};
</script>
</body>
</html>
`;
console.log(KAKAO_MAP_JS_KEY);
return (
<View style={styles.container}>
<WebView
originWhitelist={['*']}
source={{ html: htmlContent }}
style={styles.webview}
javaScriptEnabled={true}
domStorageEnabled={true}
onLoad={() => console.log('WebView loaded successfully')}
onError={(e) => console.error('WebView error: ', e.nativeEvent)}
injectedJavaScript={`(function() {
window.console.log = function(message) {
window.ReactNativeWebView.postMessage(message);
}
})();`}
onMessage={(event) => console.log(event.nativeEvent.data)}
/>
</View>
);
}
const styles = StyleSheet.create({
container: {
width: 300,
height: 300,
marginTop: 20,
borderWidth: 1,
borderColor: '#ddd',
},
webview: {
flex: 1,
},
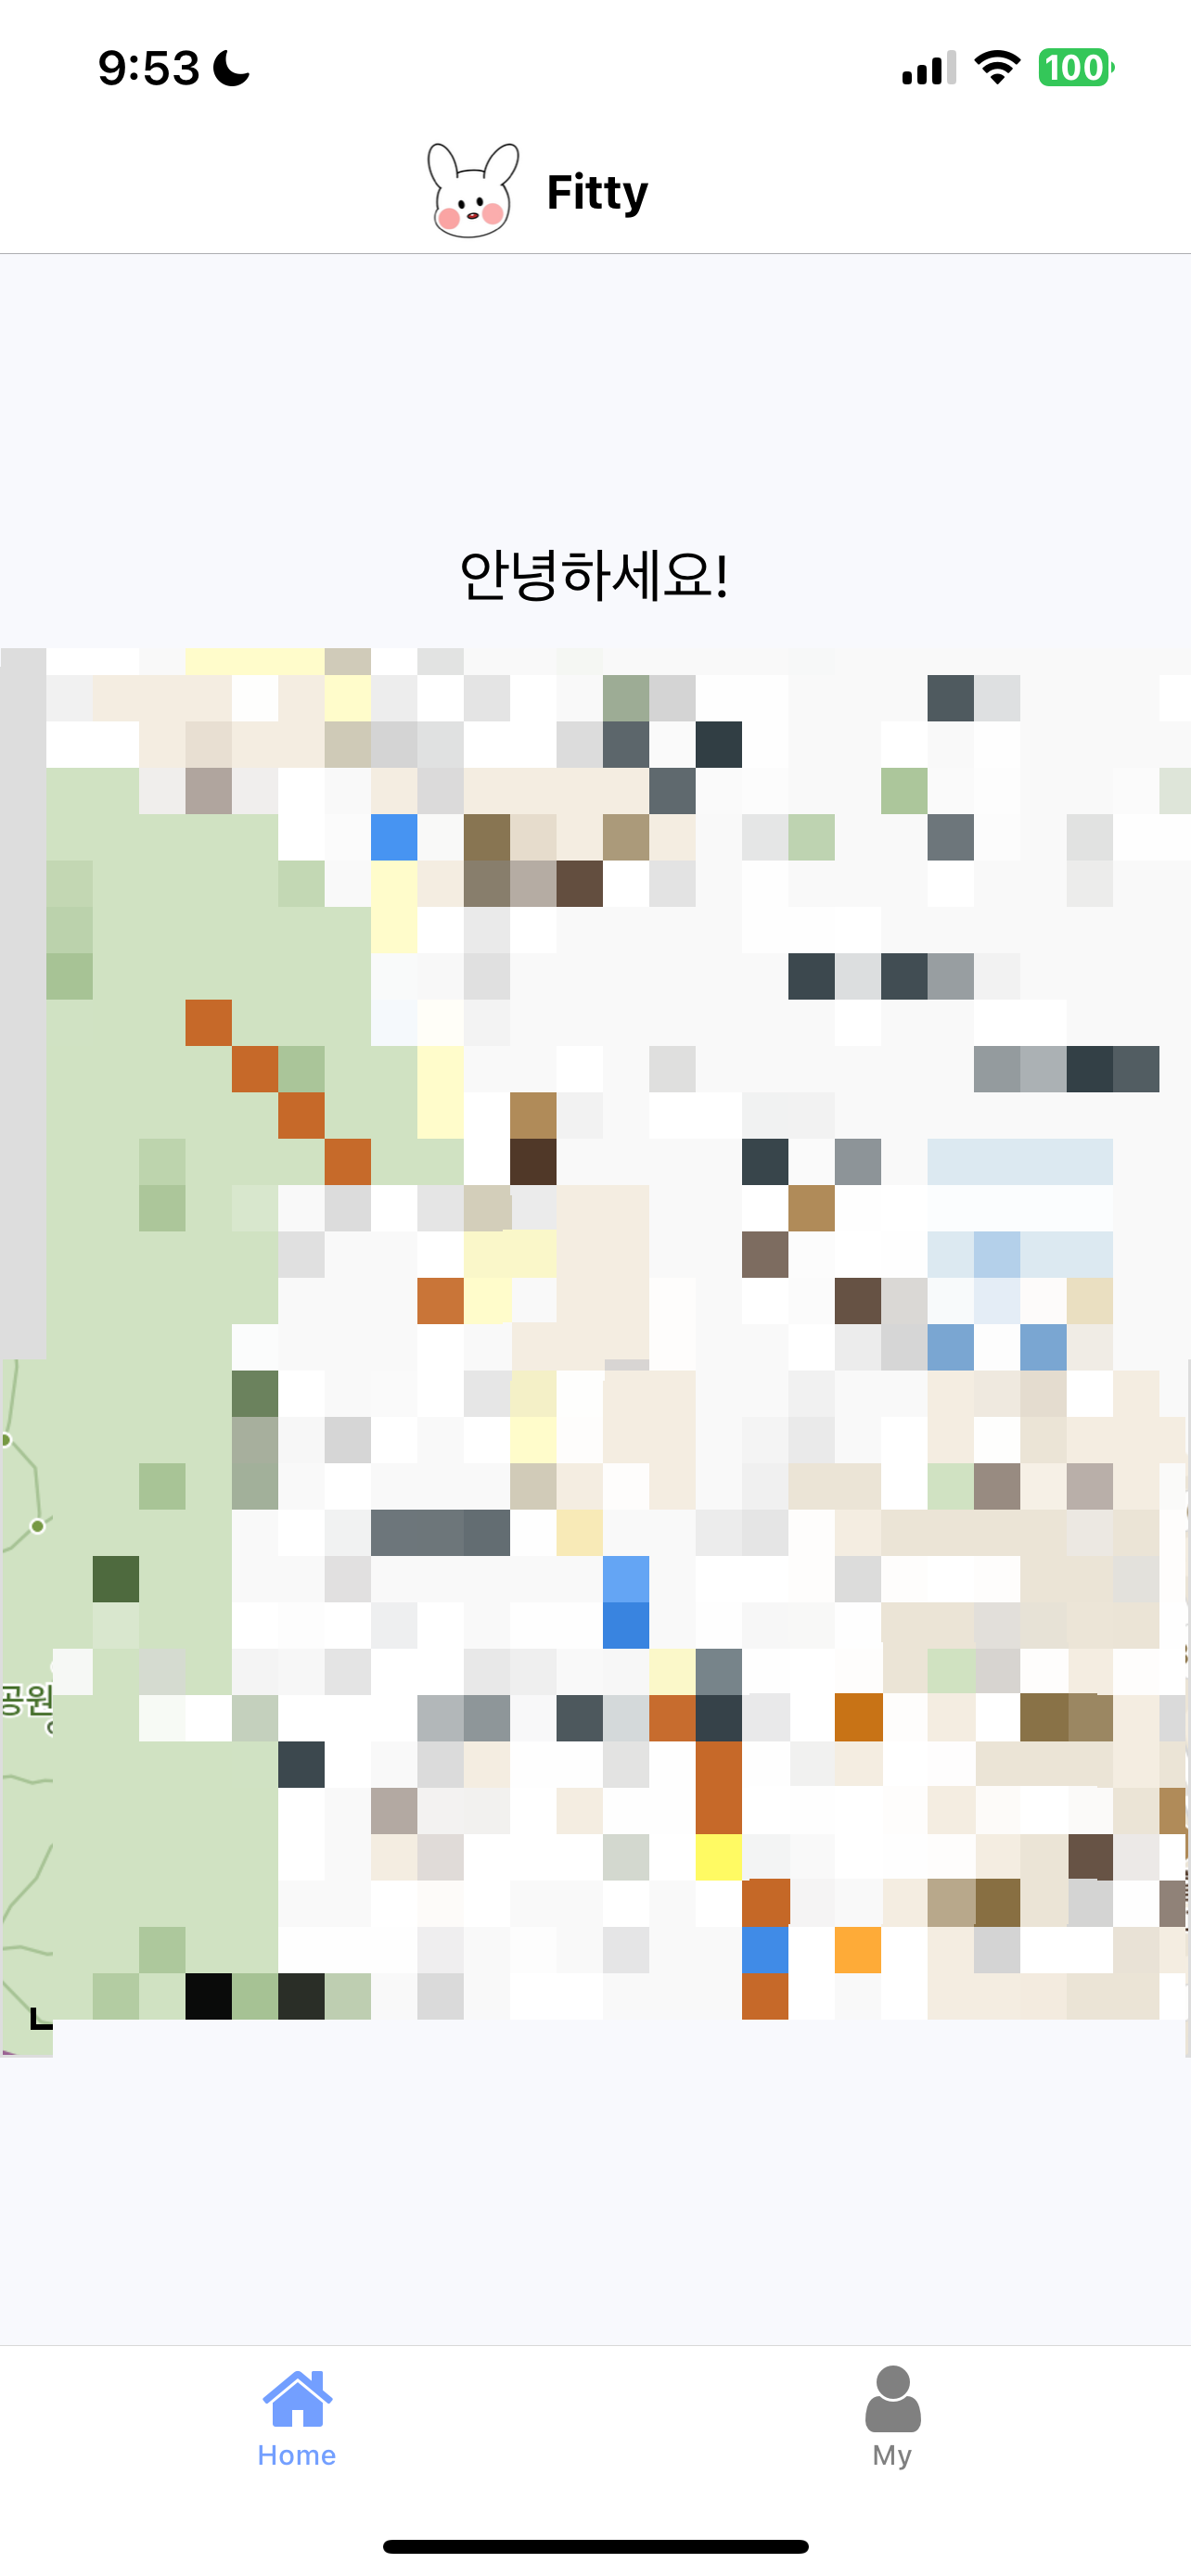
});📍현재 사용자 위치로 맵 띄우기
expo-location을 사용해 현재 위치를 가져와보자!
Location.getCurrentPositionAsync() 메서드를 사용하면 사용자 현재 위치를 가져올 수 있다. coords.latitude와 coords.longitude 값을 location 상태에 저장해 카카오맵 props로 내려주면 카카오맵에서 내 현재 위치가 잘 뜨는 것을 볼 수 있돠 🥳🥳
import React, { useEffect, useState } from 'react'
import { View, Text, StyleSheet } from 'react-native'
import * as Location from 'expo-location'
import KakaoMap from '@/components/KakaoMap'
export default function Home() {
const [location, setLocation] = useState<{
latitude: number
longitude: number
} | null>(null)
useEffect(() => {
const getCurrentLocation = async () => {
// 현재 위치 가져오기
try {
const { coords } = await Location.getCurrentPositionAsync({})
setLocation({
latitude: coords.latitude,
longitude: coords.longitude,
})
} catch (error) {
console.error('위치 정보를 가져오는 데 실패했습니다:', error)
}
}
getCurrentLocation()
}, [])
return (
<View style={styles.container}>
<Text style={styles.text}>안녕하세요!</Text>
{location ? (
<KakaoMap latitude={location.latitude} longitude={location.longitude} />
) : (
<Text>위치를 가져오는 중입니다...</Text>
)}
</View>
)
}
const styles = StyleSheet.create({
container: {
flex: 1,
justifyContent: 'center',
alignItems: 'center',
backgroundColor: '#f8f9fd',
},
text: {
fontSize: 24,
},
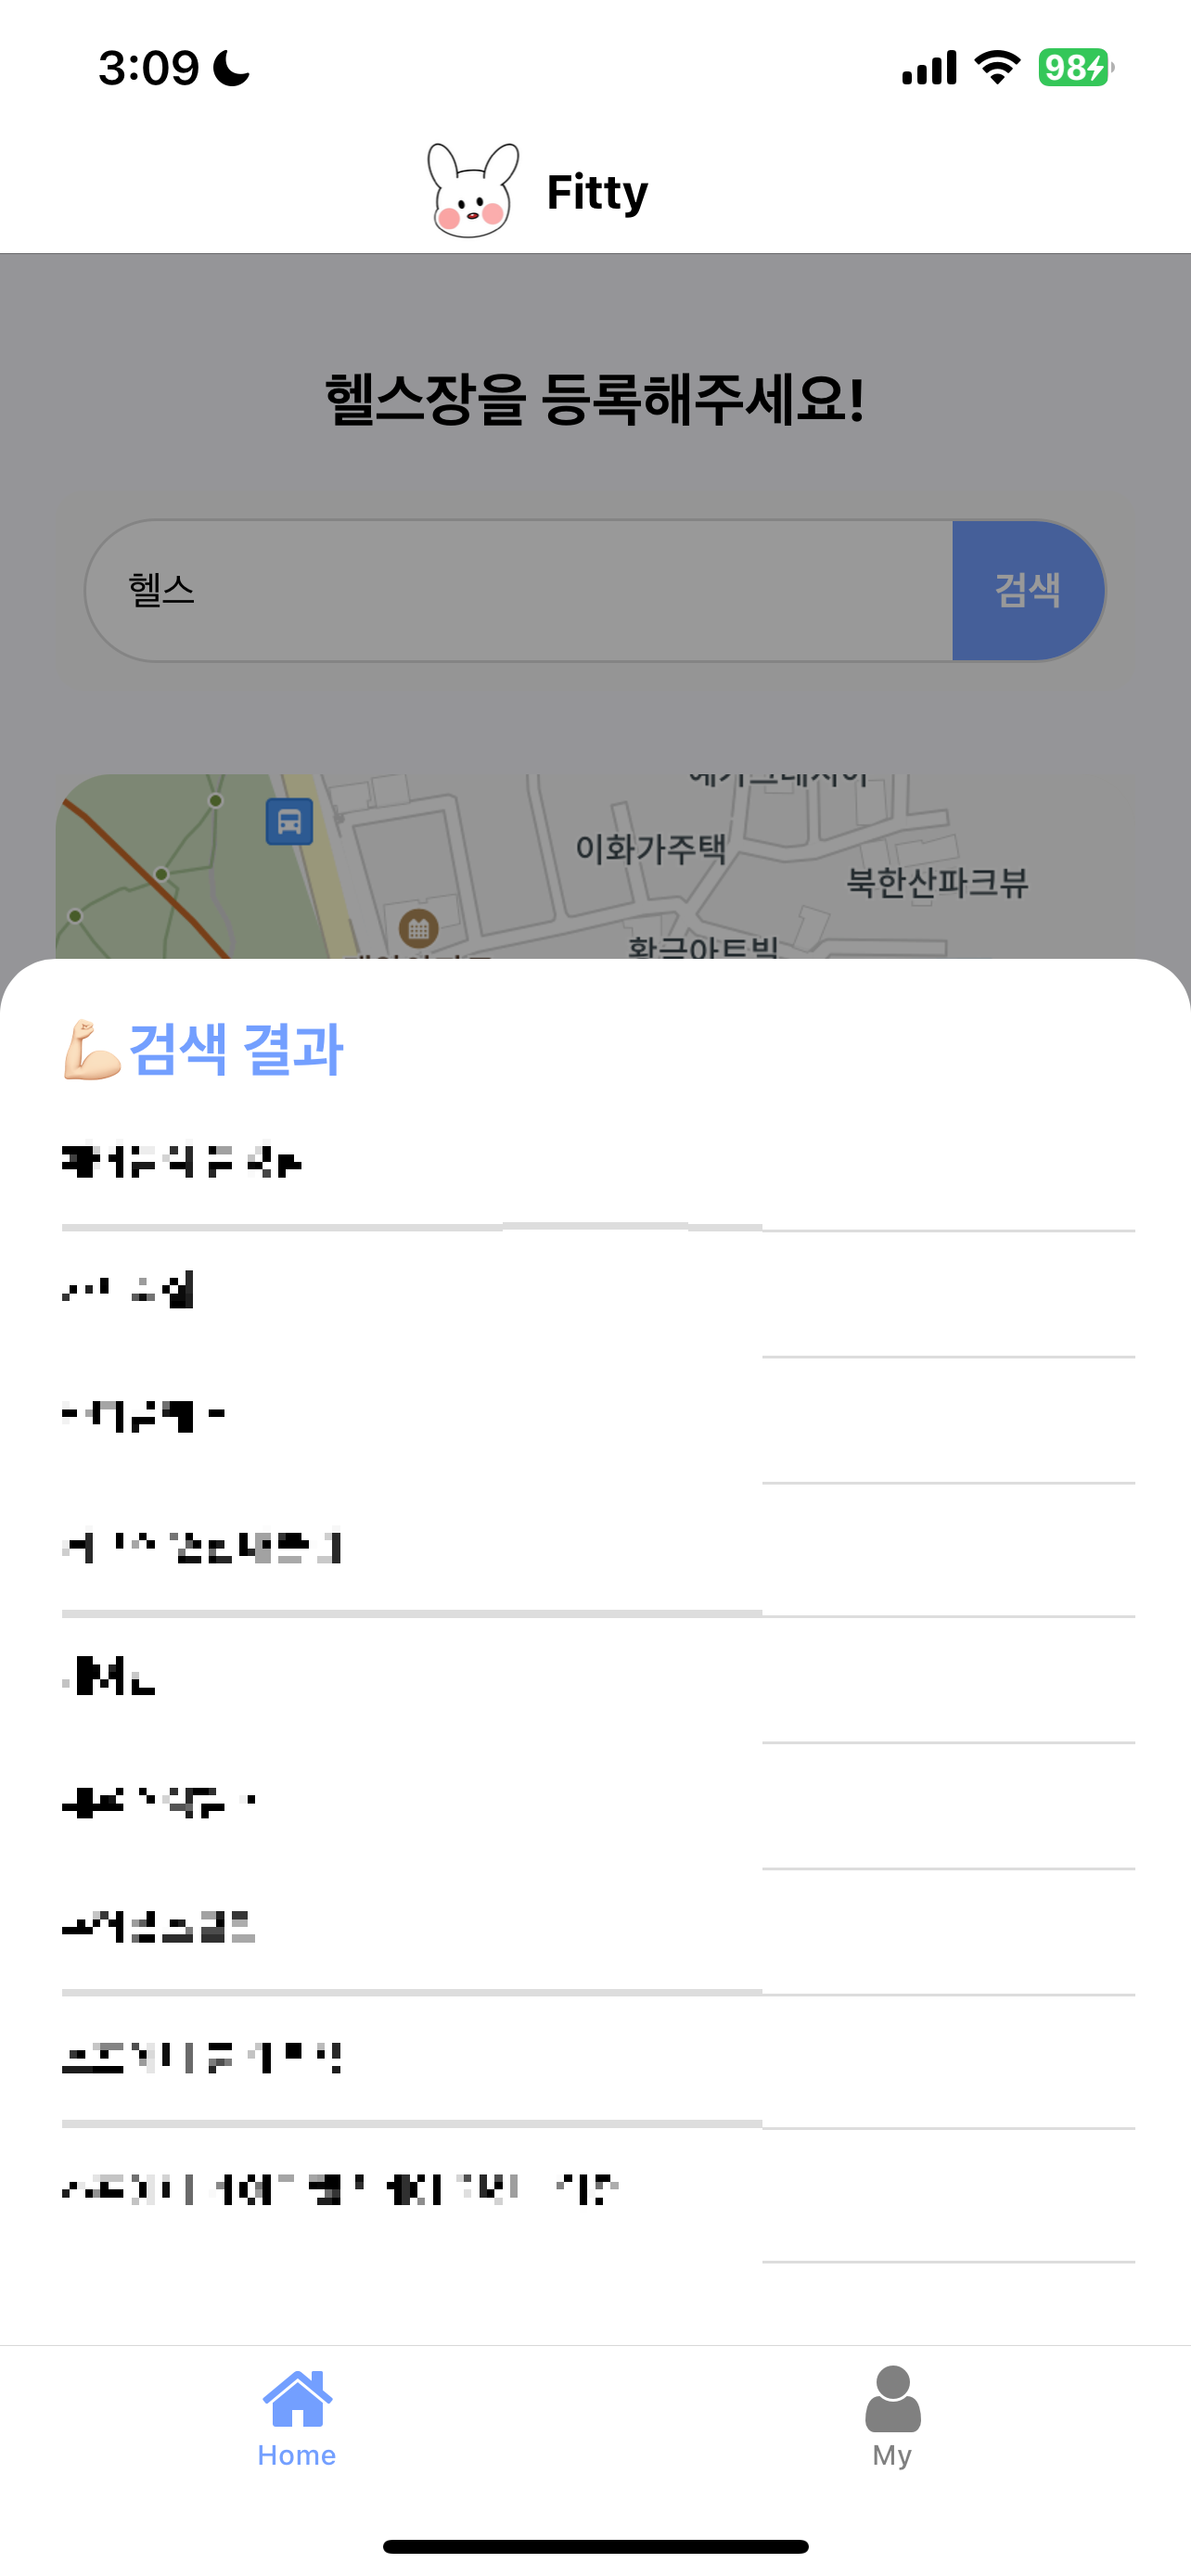
})📍키워드 검색 후 검색 리스트 띄우기
검색어를 입력하고, 해당 검색어로 Kakao API를 호출해 키워드와 관련된 근처 장소를 띄운다!!
위 과정에서 rest api key를 저장해 env 파일에 넣어주는 과정도 잊지말자!.!
const searchGym = async () => {
  if (searchQuery && location) {
    setLoading(true)
    const response = await fetch(
      `https://dapi.kakao.com/v2/local/search/keyword.json?query=${searchQuery}&x=${location.longitude}&y=${location.latitude}&radius=2000`,
      {
        headers: {
          Authorization: `KakaoAK ${KAKAO_REST_API_KEY}`,
        },
      }
    )
    const data = await response.json()
    setLoading(false)

    if (data.documents.length > 0) {
      const results = data.documents.map((doc: { y: number; x: number; place_name: string }) => ({
        latitude: doc.y,
        longitude: doc.x,
        place_name: doc.place_name,
      }))
      setSearchResults(results)
    } else {
      alert('검색 결과가 없습니다.')
    }
  }
}
검색 결과는 FlatList로 렌더링해, 결과 목록을 사용자에게 보여준다.
리스트가 약간 스택처럼 위에 쌓였으면 좋겠었어서 모달처럼 구현을 한 뒤 애니메이션을 적용해줬다.
<Animated.View style={[styles.resultList, { transform: [{ translateY: animation.interpolate({ inputRange: [0, 1], outputRange: [100, 0] }) }] }]}>
  <FlatList
    data={searchResults}
    renderItem={({ item }) => (
      <TouchableWithoutFeedback onPress={() => handleSelectResult(item)}>
        <View style={styles.resultItem}>
          <Text style={styles.resultItemText}>{item.place_name}</Text>
        </View>
      </TouchableWithoutFeedback>
    )}
  />
</Animated.View>
'🔥React 뽀개기' 카테고리의 다른 글
| Expo 알림(Notification) 구현하기 (2) | 2025.02.25 |
|---|---|
| Expo 앱 배포하기(웹 링크 + Expo QR 코드) (2) | 2025.02.15 |
| React Native에 React Query 적용하기 (0) | 2025.02.08 |
| React Native와 Expo로 간편하게 앱 개발하기 (1) | 2025.02.04 |
| 페이지네이션 초간단 구현하기 (React) (2) | 2024.12.23 |


