🚨 Vercel에서는 개인 프로젝트는 무료로 배포할 수 있지만, Organization(조직)으로 설정된 프로젝트는 유료 플랜이다...(2주 무료긴 헌디..) 하지만! 👉 우회하는 방법이 있길래 무료로 배포하고 PR Preview까지 설정하기! 해보겠다...
Vercel Organization 우회 배포🚀
1. organization 의 팀 레포를 개인 계정으로 포크해준다.

2. vercel에서 개인 계정으로 포크한 레포를 deploy해준다.

3. 깃헙 토큰 발급
개인 개정 settting ➡️ Developer Settings ➡️ 토큰 발급 (classic)
- repo 권한만 체크
- 발급된 토큰을 따로 저장해두기!

4. build.sh 파일 생성
프로젝트 루트경로에 파일을 생성 후 아래 코드를 넣자⬇️
#!/bin/sh
cd ../
mkdir output
cp -R ./[팀 레포 이름]/* ./output
cp -R ./output ./[팀 레포 이름]/
이 스크립트는 팀 레포에서 개인 레포로 코드를 복사하는 역할을 한돠!
5. secret 키 등록
GitHub 레포의 Settings ➡️ Secrets and variables ➡️ Actions에서 Secret 추가
위에서 저장한 secret 토큰은 AUTO_ACTIONS에,
EMAIL에는 내 GitHub 계정 이메일을 적어주면 된다.

6. github action 코드
📁.github/workflows/deploy.yaml 파일을 프로젝트 루트 경로에 넣어주자! (.github이 없어서 그냥 폴더 새로 만들어줌)
name: Deploy

on:
  push:
    branches: ['main']

jobs:
  build:
    runs-on: ubuntu-latest

    container: pandoc/latex

    steps:
      - uses: actions/checkout@v2
      - name: Install mustache (to update the date)
        run: apk add ruby && gem install mustache
      - name: creates output
        run: sh ./build.sh
      - name: Pushes to another repository
        id: push_directory
        uses: cpina/github-action-push-to-another-repository@main
        env:
          API_TOKEN_GITHUB: ${{ secrets.AUTO_ACTIONS }}
        with:
          source-directory: 'output'
          destination-github-username: [내 깃헙 계정 이름]
          destination-repository-name: [팀 레포 이름]
          user-email: ${{ secrets.EMAIL }}
          commit-message: ${{ github.event.commits[0].message }}
          target-branch: main
      - name: Test get variable exported by push-to-another-repository
        run: echo $DESTINATION_CLONED_DIRECTORY
위 과정을 하고 main 브랜치에서 push하면
아래와 같이 actions탭에서 성공적으로 체크표시가 뜬 것을 볼 수 있돠!! 🥳🥳

PR Preview 활성화하기 🔄
이제 PR Preview(미리보기 배포) 기능을 추가해서, PR을 생성할 때마다 자동으로 URL이 생성되도록 설정해보자!
1. preview 파일 생성
📁.github/workflows/preview.yaml 파일을 프로젝트 루트 경로에 넣어주자!
name: Preview

on:
  pull_request:
    branches: ['main']

jobs:
  vercel-preview:
    runs-on: ubuntu-latest

    env:
      VERCEL_ORG_ID: ${{ secrets.VERCEL_ORG_ID }}
      VERCEL_PROJECT_ID: ${{ secrets.VERCEL_PROJECT_ID }}

    steps:
      - uses: actions/checkout@v4
      - name: Install Vercel CLI
        run: npm install --global vercel@latest && npm install --global pnpm
      - name: Get Vercel Environment Variables
        run: vercel pull --yes --environment=preview --token=${{ secrets.VERCEL_TOKEN }}
      - name: Build Project Artifacts
        run: vercel build --token=${{ secrets.VERCEL_TOKEN }}
      - name: Deploy Project Artifacts to Vercel
        id: deploy

        run: |

          vercel deploy --prebuilt --token=${{ secrets.VERCEL_TOKEN }} > vercel-output.txt
          echo "preview_url=$(cat vercel-output.txt)" >> $GITHUB_OUTPUT

      - name: Comment PR with Preview URL
        uses: thollander/actions-comment-pull-request@v2
        with:
          message: |
            ✅ PREVIEW ${{ steps.deploy.outputs.preview_url }}

permissions:
  contents: read
  pages: write
  deployments: write
  id-token: write
  issues: write
  pull-requests: write
이제 PR을 만들면 자동으로 Preview URL이 생성될 것이돠!
2. Vercel Access Token 받기
아래 링크에 접속해 토큰을 받자. (발급된 Token 따로 저장해두기!)
Vercel Access Token 발급 페이지에서 토큰 발급
3. vercel 설치 및 배포
pnpm add -g vercel@latest
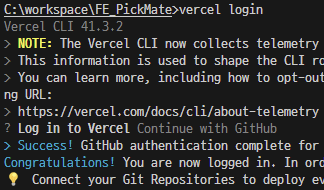
vercel login
로그인이 완료되면 vercel 명령어를 통해 github 레포 찾기

아래와 같이 .vercel 폴더가 생기면 성공!!

project.json파일에서
{"projectId":"프로젝트 아이디","orgId":"organiztion ID"}
이 있는데 요 두개를 복사하자!
3. secret 키 등록
이제 아까 위에서 따로 저장해두었던 vercel token, 프로젝트 id, orgId를 아래처럼 또 시크릿에 넣어줘야한다!!!

작업 완료 후 git push하기!!
이제 마지막 작업 🔽
4. PR test해보기
브랜치를 하나 파서 main으로 머지될 pr을 올리자!

성공적으로 preview 링크가 잘 나온다 🥳🥳🥳🥳🥳
'✨FRONTEND > 📍Next.js' 카테고리의 다른 글
| Next.js 마크다운 미리보기 적용하기 (0) | 2025.03.30 |
|---|---|
| Zustand로 로그인 상태 관리하기 (2) | 2025.03.16 |
| Next.js App Router + PWA + Firebase로 알림 구현하기 (1) | 2025.01.26 |
| Chart.js 라이브러리로 달성률 시각화 구현하기(feat. Doughnut 차트) (0) | 2024.12.20 |
| 리액트 캘린더와 Firebase로 CRD 구현하기 (2) | 2024.12.16 |


